Latest Entries »

Cues & Variations Handout – Grapevine Combo

Shambling Shimmies L2 Group Vocabulary

GRAPEVINE COMBO

Classification: Slow

Basic Cue:

Sink into cat stance facing R w/ L arm extended out towards audience.  On downbeat, begin combo by crossing L foot over right and rolling L shoulder forward (hands drop into low arm position)

Variations:

Turns: 1/4 turns in a box around each other.  Cued with a head turn during the pose and a double yip – only done in 4 person formations – each person in formation must know how to do the box from their position.

Check for updates to this post for a diagram in the future.

Decorating

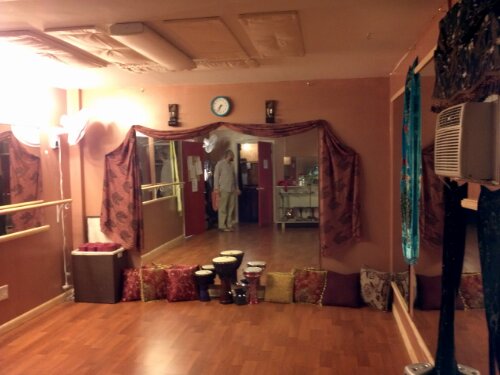
In an effort to make the studio feel a little homier until we can get the proper curtains made and hung, I’ve hung some decorative scarves and a nice big piece of silk around the studio. A couple of our mirrors (salvaged/recycled thank you very much) had little chips on the corners, which are taped for safety, and the fabric helps obscure them from view and assists in further dampening sound from zills and whatnot.

image

image

And there’s Ryan, nonchalantly in the mirror, as per standard.

Class Schedule Change!

Wednesday night classes at the Unified Training Center are moving to Monday nights (same location), starting next week!  Hope to see you around!

Level 2 Tribal Moves & Jam @ 6:30
Belly Dance Technique @ 7:35

http://www.shamblingshimmies.com/class-event-calendar/

These materials are designed to be used in conjunction with in-class instruction, which includes safety training and further break down of movements. The authors assume no liability for your use of this material.

TORCHES

TORCH BASICS:

TWIST MARCH W/ FIGURE 8

Basic Cue: Arms begin Figure 8 to the right and down while right foot twists over toward the left.

• Useful for burning off fuel

• Useful for circling

• Good showcase of high flame

PADDLE TURN W/ ARMS

Basic Cue: more often used as a solo move due to space – if you had space and wanted to cue it, you would begin facing left with arms extended directly out to the sides and start paddling very slowly with the right leg gradually raising the arms overhead picking up speed and then back down slowing back down.  As a solo move, the arms can be moved however the dancer wishes and at whatever speed.

• Useful for burning off fuel

• Good showcase of high flame

BASIC ARMS:

Basic Cue: Center, begin with slow, big right arm. 

Variations:

• Various body / leg poses and angles – these should be led into slowly and purposefully and each pose should be completed before moving into another.

• Travel: cue by leading with upper body and stepping out slowly (always start with right leg).

• Turn: cue with head turn – gradual turn -  lead passes around formation for timing of move/turn until it returns to original position.

• Levels: cue by briefly raising on toes just before starting to lower – then cue to rise by briefly lowering slightly farther just before starting to rise. Move slowly.

Alterations for Torches:

Standard Cue and Technique:

• Arms will be bigger and faster than in standard tribal.  There is also a bit of an adjustment in shape.

Variations:

• Turn: cue is still w/ a head turn, due to limited visibility during fire performances, you can also add a verbal cue of yeeeaaahh (not required during torches – but will be a required cue for gradual turns if you move onto staff) and be sure to turn very slowly. 

Considerations for Torches:

• Be very aware of your position in relation to others during this move – especially during turns. 

• Hand position is often very important and sometimes tricky depending on your torches and the height of the flame during this move.

DOUBLES

Basic Cue: Both arms come to frame right hip, right foot lifts up at the knee – there will be an exaggerated drawback before the first set of hip bumps.

Variations:

• Traveling: angle body as you step right foot forward.  Angles will swap as you travel.  Center when you reach the end. Then proceed to angle your right side back if you want to move back.

• Turn: cue with head turn – 4 corner turn – 2 hip bumps right and left to each corner and then turn to the next corner.  Lead passes around formation for timing of the turns until returning to original position.

Alterations for Torches:

Standard Cue and Technique: none

Variations:

• Turn: cue is still w/ a head turn, due to limited visibility during fire performances, you can also add a verbal cue of a double yip (not required with torches – but will be a required cue for quarter turns if you move into staff).

Considerations for Torches:

• Be sure to hold hands far enough away from body to a) not let the flame get close to your clothing and b) provide enough of an angle in your arms so the flame doesn’t get near your forearm.

• When the flame is higher, the hand/arm movement should be sharp.

SINGLES

Basic Cue: Arms in low hipwork position (arms down to sides and wrist bent, palms to floor) to signal to watch for hipwork.  Begin purposeful, steady singles – downbeat right.

Variations:

• With march or traveling – cue by lifting first (right) foot more exaggerated than otherwise.

• Arms: after the initial cue for hipwork add arms as desired (moving through standard arm positions, floreos, etc) just be sure to keep hipwork steady unless you bring the arms back to cue for a change or cue another move.

• Turn: cue with head turn – gradual turn – lead passes around formation for timing of move/turn until it returns to original position.

• Levels: cue by briefly raising on toes just before starting to lower – then cue to rise by briefly lowering slightly farther just before starting to rise. Move slowly. (can add raising/lowering of the arms to this cue for additional visibility and depending on circumstances).  Basic principle of levels: up to go down, down to go up.  Pay attention to which level position the leader has their feet in (together, kickstand, lunge-prep) – it will tell you how far they intend to go down.

Alterations for Torches:

Standard Cue and Technique: none

Variations:

• Arms: arms should predominantly stay near hips to light them (if they move away from the hips, people will not be able to see what you are doing)

• Turn: cue is still w/ a head turn, due to limited visibility during fire performances, you can also add a verbal cue of yeeeaaahh (not required during torches – but will be a required cue for gradual turns if you move onto staff) and be sure to turn very slowly.

Considerations for Torches:

• Be sure to hold hands far enough away from body to a) not let the flame get close to your clothing and b) provide enough of an angle in your arms so the flame doesn’t get near your forearm.

• Because the arms do not move much in this move it is really an accent move – not one to stick with for extended periods of time.

STAFF

STAFF BASICS:

ROTORS

Basic Cue: Bring the staff horizontal in front of you with hands close together and make the first turn slow/exaggerated to show which direction the rotor will be, picking up speed gradually.

• Can be done in either direction and overhead (also behind the back, at various angles, etc in future levels)

• A basic ‘isolation’ included in other moves in the vocabulary – in those cases, the direction will be specified.

• Good for burning off fuel

• Good for showcasing high flame

• Good for showcasing speed

WEAVES

Basic Cue: Bring the staff into one hand, pause slightly and make the first scoop of whichever weave you are going into slower and more exaggerated, picking up speed gradually from there. 

• Can be done in either direction and either hand

• Can be done fast or slow

• A basic ‘isolation’ included in other moves in the vocabulary – in those cases, the direction and hand will be specified.

• Good for burning off fuel

• Good for showcasing high flame

• Very large move

FIGURE 8s

Basic Cue: Bring the staff into one hand out to the side, pause slightly and make the first drop/scoop or whichever figure 8 you are going into slower and more exaggerated, picking up speed from there.

• Can be done in either direction and either hand

• Can be done fast or slow

• Can be done close or extended and at most angles of the arm

• A basic ‘isolation’ included in other moves in the vocabulary – in those cases, the direction and hand will be specified.

• Good for burning off fuel

• Good for showcasing high flame

• Very tight/narrow move

Studio Update

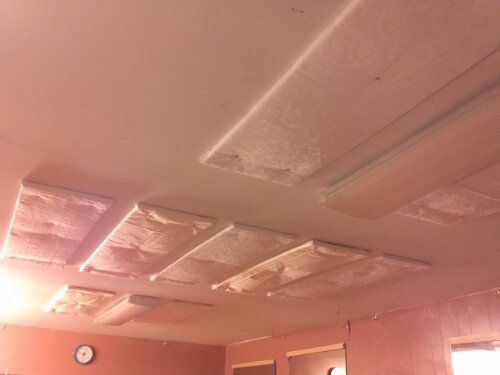
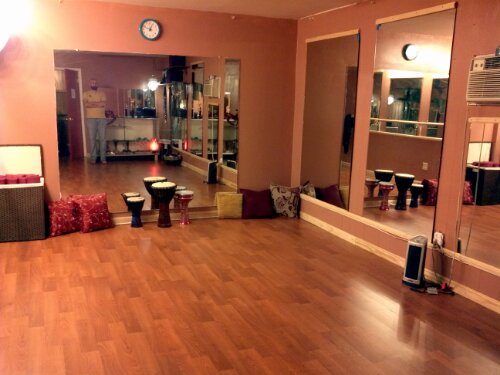
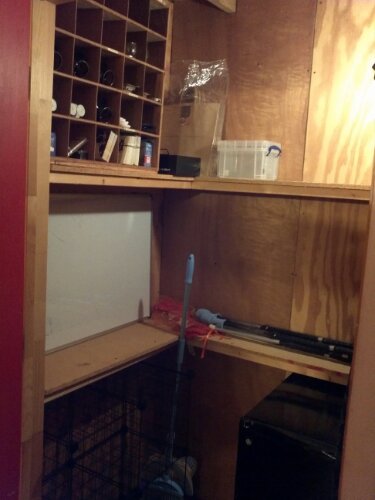
The studio has been gradually progressing! We still have curtains and a bit of decor to do, and I need to get the rest of ‘the office’ set up in the closet, but all the big stuff is done. Come visit us!

Foam panels on the ceiling to help muffle zill echoes:

image

Some comfy cushions, yoga mats, and a couple drums:

image

The display case and class stuff corner:

image

One side of our freshly cleaned out storage closet:

image

I’m excited about that mini fridge – it’ll save us having to run next door for drinks or snacks on longer days.

Shirt to Backless Choli Conversion

For practice and performances (especially in the tribal style) you can never have too many backless choli tops.  These tops have a solid front and an open back, with a band around the bottom that ties at the back of the rib cage, and straps at the shoulders that tie behind the neck.  The good news is that these are actually fairly easy to make from an existing top!  This tutorial will walk you through the simplest method (I’ll add pictures when I make another one of these tops).  If you have more experience sewing, you can also make modifications to further customize your top (such as changing the neckline, sleeves, adding darts, etc).

These tops are great to make from simple t-shirts for practice, and fancier fabric (such as velvet) for performance.  Keep an eye out at yard sales or your local thrift store and you should find lots of tops that would make great conversion projects!

Materials:

  • Stretchy top that fits snugly (it shouldn’t be baggy, but it shouldn’t be super tight either – you should be able to move around without strain on the garment), has a neckline and sleeves that you like, and is long enough to provide extra fabric to make straps.  (It should come down at least to your belly button, and it would be preferable if it came down to your hip bones or lower.)  If your shirt is not long enough, you will need to find other fabric to make the straps.
  • Scissors
  • Pins
  • Sewing Machine (that can do a zig zag stitch).
  • Thread
  • Ruler or Hem Gauge (optional, you’ll want one if you aren’t very comfortable with visually judging the size of things)
  • Safety pin

The Process:

  • Step 1: Mark and cut the new bottom of the shirt.
    • Put on your top and mark with a pin where the rib cage band should be (you’ll want this solidly under your bust, so that the band will be secure and the top won’t ride up.)
    • Take the top off, lay it out nice and straight, and mark a horizontal line half an inch down from where you pinned.
    • Cut along your line, save the lower half of the shirt.
  • Step 2: Mark and cut the back opening.
    • Put the shirt back on.  Mark with a pin (on one side) at the bottom edge of the shirt, where you’d like the back opening to be.  (Some people prefer a narrow opening in the back, while others prefer it wide.)
    • If you want the opening to be narrow, also mark (on the same side) on the collar where the back opening should be.  (For a standard or wide opening, we will always have the opening start where the shoulder seams are, so there is no need to mark the top edge.)
    • Take the top off, and match up (and pin) the following points: shoulder seams at collar, side seams at arm pit, sleeve seams along back of the arm hole, side seams down to the bottom edge of the top.
    • Lay the top out so that there is a fold at the center back and your pinned marks from before are facing up so you can see them.  (You will cut through both sides of the back at the same time so that they match.)
    • Mark a line starting half an inch (toward the center) from your lower mark to half an inch (toward the center) from your upper mark or the shoulder seam at the collar.
    • Cut through both layers along this line.
  • Step 3: Hem the back side edges.
    • Fold the edges you just cut under half an inch, pin them in place, and stitch them down using a zig zag stitch (this will allow them to retain some extra stretch without popping stitches).
    • You can use a straight stitch for looks, if the top is not so snug that you are concerned about these edges needing to stretch much.
  • Step 4: Measure and cut straps.
    • Grab the bottom portion of the shirt that you retained from Step 1.
    • Mark three 3 inch wide bands across the shirt.
    • Cut these bands from the shirt.
    • Cut one of them on the side seams (so that you have 2 even sized shorter strips).
    • Cut the other two on one of the side seams (so that you have 2 even sized long strips).
  • Step 5: Assemble rib cage band.
    • Take your two long bands and sew them together on one of the short ends (so that you have one very long strip).
  • Step 6: Attach rib cage band.
    • With the right sides facing one another, match the center of the long strip to the center front of the bottom edge of the top and pin.
    • Pin the strip to the shirt along the bottom edge.
    • Sew with a straight stitch (you don’t want this to stretch much, as you want to keep the shirt hem firmly down under your bust).  Leave a half inch seam allowance.
    • Stitch this seam twice if you are concerned about the strain it may be under.
    • Start and stop stitching at the back side edges (don’t sew out onto the strap itself beyond the edges of the shirt yet).
    • Starting at the center front, fold the band over toward the wrong side of the top.  Tuck in half an inch of the band, so that it seals up the seam you just made to attach the band to the shirt.  Pin in place.
    • Continue to fold over the band and pin in place along the bottom of the shirt.
    • Also fold, tuck in the seam allowance, and pin the rest of the straps on either side of the shirt.
    • Stitch again along the full length of the straps to close them up (twice for extra strength if needed).
    • Tuck the ends in and stitch  to seal the ends on each side.
  • Step 7: Assemble shoulder ties.
    • Get the two shorter strips from Step 4.  Repeat these steps for each one.
    • Fold it in half down the length of the pieces (right sides together).
    • Pin the long edges together.
    • Stitch with a straight stitch down the long edges to make two tubes.
    • Turn the tubes right side out (pin a safety pin to one end of the tube, and then feed it (with the rest of the tube following it) back through the tube and out the other end).
    • Tuck the short ends in (on one end of the tube) and stitch closed.
  • Step 8: Attach shoulder ties.
    • Take the open end of one of your tubes and pin it in place at the top edge of the back opening.
    • Stitch securely by sewing over the area multiple times.
    • Repeat on opposite side.
  • Step 9: Try out your new top!
    • It’s often easiest to tie the rib cage straps first to help hold the top up, then the shoulder straps, then adjust the rib cage again if needed.
    • Once the shoulder straps are adjusted, you may want to leave them tied and just pull them over your head for future wearings.

Shambling Shimmies L2 Group Vocabulary

UP UP DOWN DOWN

Classification:  Fast

Basic Cue:

  • Bring arms into relaxed second, lift arms into high second as you begin releve 3/4 feet starting on R side beginning w/ a hip up on the R side

Variations:

  • Half turns: cue – one cycle arms in 4th. Turn is one full (R,L) cycle to the back and one to the front (arms in 4th.
  • Turn is to right with the right foot stepping.
  • The arms are arranged such that the arm out to the front is on the same side of the body as the hip that will be dropping. (Example: When the ups start on the right foot, the right arm will go up and the left arm out in front, because the hip drops will happen on the left hip.)

Zills/Timing:

  • Timing –8 count move – 4 counts right, 8 counts left
  • Zill Pattern – 3-3-7

Zill Pattern / Move Timing Broken Down –

1 & 2 & 3 & 4 & 1 & 2 & 3 & 4 &
R R L R R L R L R L R R L R R L R R L R L R L R R L
STEP RIGHT RELEVE HIP UP STEP LEFT RELEVE HIP UP SHOWGIRL RIGHT LEFT HIP DOWN SHOWGIRL RIGHT LEFT HIP DOWN STEP LEFT RELEVE HIP UP STEP RIGHT RELEVE HIP UP SHOWGIRL LEFT RIGHT HIP DOWN SHOWGIRL LEFT RIGHT HIP DOWN


Cues & Variations Handout – 3/4 Maya

Shambling Shimmies L2 Group Vocabulary

3/4 MAYA

Classification:  Slow

Basic Cue:

  • Typically cued out of maya, cue is a wider than usual maya on the R side w/  a slight lift indicating (and then proceeding into) the level.
  • (Hands then come into rest position and stay with the hips for the two smaller mayas which return to standing)

Variations:

  • 1/4 turns to the sides … head turn cue … complete move on both sides of body at each side.